Pick a New Engine | What to Look For | Making a Blank | Removing the Old Engine | Disconnecting Systems | Mounts and Coupler | Lifting the Old Engine | Engine Beds | Shimming | Filling Holes | Flat Mounts | Landing the Engine | Exhaust System | Other Systems | Finishing Up
Making the Mock Engine.
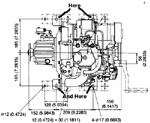
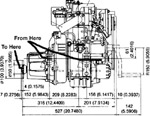
| Find the location of the 4 mounts on the new engine diagram provided by the manufacturer. The best place to find this info is in the installation diagram of the engine, often first few pages of the service manual. Draw out on a sheet of ½” plywood the 4 holes where the mounts would screw in. Here are some engine installation diagrams. |
 Click Image for better resolution |
|
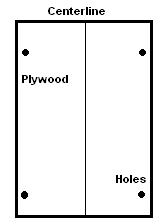
| Once the holes are marked, create a centerline; you will make a wooden coupler along this line later. The centerline will continue the line formed by the existing shaft. All measurements should begin or at the least double check with the shaft line. This includes up and down, side to side. The base line to follow for fore and aft should be from or at the least begin at the coupling face as a base line. I find that the top face of your plywood works out to be the best place to represent the centerline of the drive shaft. |  |
|
| Now cut out your fake engine like this: This will provide you with quite a lot of information, and you can swing a square piece of plywood around in the engine room a lot easier than you can swing a 400 lb steel engine. It is absolutely mandatory if you are putting in any engine other than exactly the same make, model, and year you took out. And if you were doing that, why repower? |  Click image for better resolution |
|
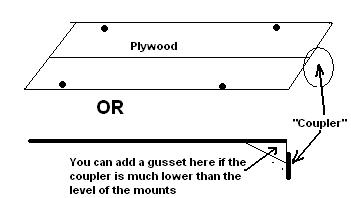
Our plywood engine is still incomplete, though. It is missing a vital bit of data. The defining piece of an installation is the location of the coupler. Now we go back to our manufacturer’s specs to see where the coupler is in relation to the mounts centerline of the drive shaft: Now we make a plywood coupler. Get a hole saw of the same diameter as the new engine’s coupler, and cut out a circle.Or use a jigsaw, this doesn’t have to be perfect to the millimeter. We are going for a rough idea at this stage. |
||
| Glue or screw on the coupler on the edge of your “engine” at the correct height. You should have something that looks like this |  |
|
Now you are ready to fit your new engine. If it is going to be really close, consider making a vertical piece to show how tall your new engine will be. Fortunately, most newer engines are smaller than their older cousins, unless you’re getting really greedy about increasing horsepower. If you skipped "What to look for in a new engine ", click here to check it out |
||
If you would like to use the content of these articles, please contact us.
