Pick a New Engine | What to Look For | Making a Blank | Removing the Old Engine | Disconnecting Systems | Mounts and Coupler | Lifting the Old Engine | Engine Beds | Shimming | Filling Holes | Flat Mounts | Landing the Engine | Exhaust System | Other Systems | Finishing Up
Fixing the Mounts to Fit the New Engine.
If the old stringers stick up higher than your new engine blank, you may not be able to use the new engine. If the new engine is significantly smaller, you may be able to squeeze it between the stringers, bolting on some type of L-bracket to make a new lower and narrower bed between the old beds. There’s a chance you could cut down the existing stringers also, but usually that means some part of the new engine will be hitting your hull. You haven’t paid for that new engine yet, have you?
The usual cure for an engine that wants to rest its oil pan against the hull is to move the engine forward and get a longer shaft. Careful, though, as this can end up with an engine sharing your cabin with you. Worst case hack out and reglass the stern tube to get the engine at a different angle. This won’t work if you have a strut, unless you can reaim the strut. Definitely requires a haulout, and these are major issues, outside of the scope of this article.
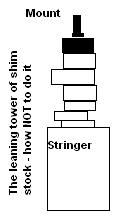
For now, let’s pretend your plywood engine would have fit if only the stringers were 1.5” higher. Now is the fun part. There are many ways to skin this cat. The way not to do it is to make a huge stack of shims, so that the mounts are tottering on the top of a tower of wood or aluminum pieces.

This will make it virtually impossible to properly align your new engine. It’s OK to use some shims to get to the right height now while the plywood engine is here, but they will then act as a guide for how much material you are going to add to your stringers. The way that I prefer to bed an engine is to:
- Measure how much I need to add, making sure all measurements are done with the mounts around the middle of their adjustment.
- Cut large wooden blocks to be about ¼” to 3/8” too short.
- Wrap the blocks in heavy fiberglass outside of the boat somewhere. This makes up the ¼ with the width of the glass.
- Consider mechanically fastening the new blocks down to the old stringers with some big lag bolts for added security.
- Bed down the new blocks and glass them solidly to the existing stringers (prep your surface or the glass won’t stick)
- Paint everything in sight with a thick layer of glossy white gel coat.
This will leave you with a nice clean shiny white engine bed, solidly mounted new stringers, and the lingering smell of gel coat for a week or so. Ventilate! Spray some Mold Release on and clean it with a wet cloth after the gel cures to help that a bit. Anyway, now we have a solid point to attach the engine to. Check again with your plywood engine…
Some other approaches are to mount aluminum L-brackets or buy fancy modified mounts to make the new engine fit. By the way, I don't recommend steel because stainless will warp and crack under the loads, and anything else will rust away over time. Do what you have to, make it happen, but do not compromise on the following: The bed where the engine mounts bolt down to MUST be perfectly flat to the plane of the engine. If it’s at an angle you will wear out mounts very fast. The mounts MUST be directly under the mounting holes in the engine. If you lower the engine and 3 mounts slip into the holes and the fourth is off by ½” you cannot proceed, you have to move the mount.
Next: How do I move the Mount?
If you skipped "Engine Beds", click here to check it out
If you would like to use the content of these articles, please contact us.
